By Violet Harlow
A furrion 12v fridge fuse conversion kit lets you wire a Furrion 12V fridge so it draws DC power through a properly sized fuse and a clean, protected circuit instead of an improvised connection. In this guide you will learn what the kit typically contains, how to confirm your fridge is compatible, and how to install and test the setup without damaging the fridge, the battery or the wiring. The steps below assume basic tools and a working knowledge of 12V systems.
What a Fuse Conversion Kit Actually Does
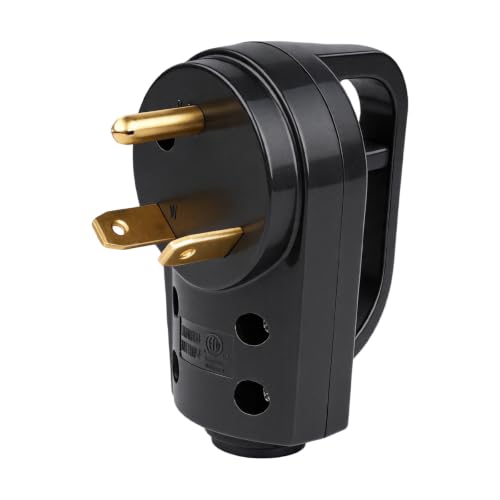
Most Furrion 12V fridges ship with a power cord and a plug designed for a specific connection method. When you move the fridge into a van, trailer or camper, you usually need to wire it directly to a house battery or a distribution panel. A fuse conversion kit is a bundle of parts that lets you do that: an inline fuse holder, a fuse of the correct rating, a plug or terminal adapter, and sometimes a short length of wire with ring terminals. The goal is simple. Current flows from the battery, through a fuse rated for the fridge circuit, into the fridge, and back to the battery through a ground path that is just as protected.
Shopping for one? See our guide: Furrion 12V Fridge Problems: Common Issues and Fixes.
Manufacturers generally specify the fuse rating and wire gauge for their appliances in the installation manual. Treat those numbers as the baseline. If your fridge model’s documentation calls for a specific amperage fuse, use that value rather than a generic one.
Before You Buy or Install: Check Compatibility
Before you order any kit, confirm three things. First, identify your exact Furrion model, which is usually printed on a label inside the fridge compartment or on the back panel. Second, check the rated DC current draw in the manual or on the nameplate. Third, confirm the battery voltage you are working with. Most fridges in this category run on 12V DC, but some installations use 24V systems, and a 12V fridge should not be connected to a 24V supply.
Also check whether your fridge already has a built-in fuse or a protected plug. Some units include a fuse in the power cord; others rely entirely on the external circuit. If yours has an internal fuse, a conversion kit may be used to replace or bypass the stock arrangement, and you should follow the manufacturer’s guidance on whether bypassing is acceptable.
Compatibility quick check
| Item to Check | Where to Find It | Why It Matters |
|---|---|---|
| Exact model number | Label inside fridge or rear panel | Determines correct fuse and wiring specs |
| Rated DC current | Manual or nameplate | Sets the minimum fuse size |
| System voltage | Battery label or multimeter reading | Prevents connecting a 12V fridge to 24V |
| Wire gauge requirement | Installation manual | Undersized wire overheats under load |
| Existing internal fuse | Power cord or control board | Affects whether you need an external fuse |
Tools and Parts You Will Need
Gather everything before you start. Stopping mid-install to hunt for a crimper or the right fuse size leads to rushed connections, and rushed connections cause most electrical trouble in RVs.
- The conversion kit or the components it includes: inline fuse holder, correctly rated fuse, ring terminals, and plug or lug adapter
- Wire of the gauge specified in the manual (for short runs, heavier wire is safer than lighter wire)
- Wire stripper and a ratcheting crimping tool sized for your terminals
- Digital multimeter for checking voltage and continuity
- Heat-shrink tubing or quality electrical tape
- Socket set or wrench for battery terminal bolts
- Zip ties and a mounting plate or bracket for the fuse holder
- Marker for labeling both ends of each wire
Step-by-Step Installation of a Furrion 12V Fridge Fuse Conversion Kit
Step 1: Disconnect all power
Turn off the fridge and disconnect the battery’s negative terminal first, then the positive terminal. Confirm with your multimeter that no voltage is present on the wires you plan to handle. Working with the system live is the most common cause of accidental shorts during these installs.
Step 2: Mount the fuse holder close to the battery
Place the inline fuse holder on the positive side, as close to the battery terminal as practical. Keeping the fuse near the source means that a fault anywhere along the run is interrupted quickly. Mount it on a dry, non-flammable surface and keep it away from moving parts or heat sources. Many installers aim for a distance of no more than about 7 inches from the battery post, which is a common guideline in marine and RV wiring references, though you should verify the exact recommendation in your kit’s instructions.
Step 3: Run and cut the positive wire
Route the positive wire from the fuse holder to the fridge’s power connection. Measure with some slack, but avoid leaving long loops that can chafe. Cut the wire to length, strip the ends, and install the appropriate terminal. Do not add the fuse yet.
Step 4: Crimp terminals correctly
Crimp each ring or lug terminal with a proper crimping tool. A good crimp should resist firm pulling without the wire slipping out. Add heat-shrink over each crimp for protection. Poor crimps create resistance, which generates heat at the connection point.
Step 5: Connect the negative (ground) path
Run a negative wire of the same gauge from the fridge to the battery negative or a chassis ground point that your system uses. Keep the ground run as short as you reasonably can. Verify that the ground connection is clean and bare metal, not painted or corroded.
Step 6: Install the fuse and label everything
Insert the fuse only after all connections are secure. Label the positive and negative runs so future troubleshooting is easier. Note the fuse rating on the label as well.
Step 7: Reconnect and test
Reconnect the battery positive terminal first, then the negative. Turn the fridge on and check the voltage at the fridge terminals with your multimeter. Expect a reading close to your battery’s voltage under light load. Watch the fuse holder and connections for warmth over the first hour of operation. Any noticeable heat means you should shut down and recheck the crimps and wire gauge.
Choosing the Right Fuse and Wire Size
Fuse selection is where most people go wrong. A fuse should be rated above the fridge’s normal running current but below the maximum current the wire can safely carry. If the fuse is too small, it blows during normal compressor starts. If it is too large, a fault may not clear before the wire overheats. Follow the manufacturer’s stated fuse rating whenever it is provided, and consult a qualified electrician or RV technician if the numbers are unclear.
Wire gauge follows the same logic. Thin wire over a long run causes voltage drop, which makes the compressor work harder and can shorten its life. As a general rule, keep voltage drop low for appliance circuits; many RV builders aim for well under a few percent. Measure the run length and match it to a wire gauge chart for 12V DC circuits.
Common Mistakes to Avoid
- Installing the fuse holder far from the battery, which leaves a long unprotected section of wire
- Using a fuse rating far above what the manual calls for because the fuse keeps blowing
- Undersizing wire to save a few dollars’ worth of material, then wondering why the fridge runs hot
- Relying on a crimp that looks fine but pulls out under light tension
- Connecting to a 24V system or a shared circuit with other high-draw loads
- Skipping the post-install voltage check under load
Tips for a Reliable Setup
- Keep wiring routed away from hot exhaust areas, sharp edges and moving parts
- Use grommets wherever wires pass through metal panels
- Check connections after the first few trips, since vibration can loosen terminals
- Carry a spare fuse of the same rating in an accessible location
- If the fridge runs but seems to struggle, review the power draw and battery capacity before blaming the kit
Recommended gear
A fuse holder and a proper crimping tool make the biggest difference in a clean install. A digital multimeter lets you verify voltage before and after the work.
- Inline automotive fuse holder: Holds the fuse securely near the battery and keeps the connection protected from moisture. View on Amazon
- Ratcheting crimping tool for ring terminals: Produces consistent, tight crimps that resist pulling and heat buildup. View on Amazon
- Digital multimeter: Lets you confirm battery voltage, check continuity and verify the fridge is receiving proper voltage under load. View on Amazon
- Adhesive-lined heat-shrink tubing: Seals crimps against moisture and adds strain relief at terminal ends. View on Amazon
FAQ
Do I need a fuse conversion kit for every Furrion 12V fridge?
Not always. Some installations come with a factory-provided cord and protection, while others, especially permanent builds, benefit from an external fuse and wiring kit. Check your model’s manual to see what protection is already included.
What fuse rating should I use?
Use the rating specified by Furrion for your model. If the manual gives a range or no value, base your choice on the fridge’s rated DC current and the wire size, and confirm with a qualified installer.
Can I connect the fridge directly to the battery without a fuse?
You should not. Without a fuse, a short circuit in the wiring can overheat conductors and create a fire risk. Always protect the positive run with an appropriately rated fuse close to the battery.
Why does my fuse blow when the compressor starts?
A compressor draws a higher surge current at startup than during steady running. A fuse that is too small for the startup surge will blow. Check the manufacturer’s rating and confirm your wire size and connections are sound, since high resistance can also cause nuisance blowing.
Can I use the same fuse conversion setup on a 24V system?
No. A 12V fridge is designed for 12V DC. Connecting it to 24V can damage the compressor and control electronics. If your vehicle or RV runs on 24V, consult the manufacturer or an installer about a suitable model or a voltage-matched solution.
How do I know if my wire is too thin?
Measure voltage at the fridge with the unit running. A significant drop compared to the battery reading indicates voltage drop, which often points to undersized wire or loose connections. Compare your run length and current draw against a 12V DC wire gauge chart.
Should I hire a professional for this job?
Many people complete simple fridge circuits themselves, but if you are unsure about wire sizing, battery configuration or your vehicle’s electrical system, consult a qualified electrician or certified RV technician before proceeding.
What should I do if the fuse holder gets warm?
Turn the fridge off immediately, disconnect power, and inspect every crimp and terminal. Heat usually means a high-resistance connection or undersized wire. Correct the problem before running the fridge again.
Conclusion
A furrion 12v fridge fuse conversion kit gives you a protected, properly sized power connection that keeps your fridge running reliably on the road. The keys are matching the fuse and wire to the manufacturer’s specifications, mounting the fuse close to the battery, making solid crimps, and testing voltage under load. Take your time with each step, and recheck everything after the first few trips.
Related reading
- Furrion 12V Fridge Fuse: How to Find, Check and Replace It
- 12V Fridge Conversion Kits: How to Choose and Install One (2026)
- Furrion 12V RV Fridge Review: Features and Performance
Ready to choose one?

About Violet Harlow
Violet has been writing about off-grid power for camping, rv & vanlife for this site, with an eye on clear explanations, honest trade-offs and options for different needs and budgets.