By Lauren Holland
Updated November 2026
An RV power control system is the set of components that decides where your electricity comes from, where it goes, and how much you can safely use at any moment. By the end of this guide, you will understand each part of a typical system, know how to map your loads and battery capacity, and have a practical checklist for setting up or troubleshooting your own rig. Whether you camp on shore power, boondock on batteries, or split the difference with solar, the same principles apply.
What an RV Power Control System Actually Does
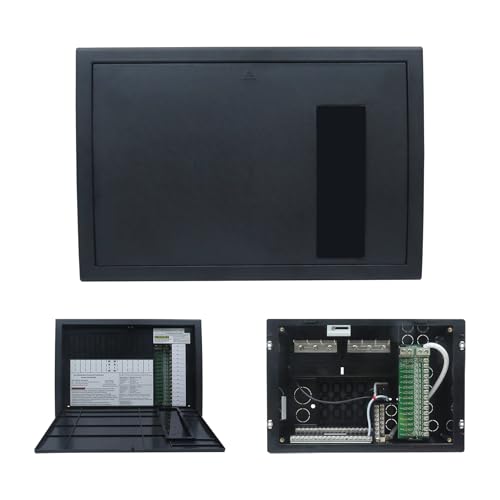
Most people think of their RV power as “the battery” or “the hookup,” but the real work happens in the control layer that sits between those sources and your appliances. A well-organized rv power control system routes incoming power, charges your batteries, protects wiring from overloads, and tells you what is happening through a monitor or panel. Without that layer, you are guessing about how long your lights will last or whether the microwave and the air conditioner can run together.
Shopping for one? See our guide: 7 Best RV Off Grid Power System Options for Campers in 2026.
The core job breaks down into four functions:
- Source selection: choosing between shore power, a generator, solar input, or the house batteries.
- Charging: converting and regulating power to keep batteries at the right voltage.
- Distribution and protection: feeding 12V and 120V circuits through breakers and fuses.
- Monitoring: showing voltage, amp draw, state of charge and remaining runtime.
Main Components of an RV Power Control System
Every rig is a little different, but most systems include the same parts. Knowing what each one does makes troubleshooting far easier.
Converter / Charger
The converter takes 120V AC from shore power or a generator and produces 12V DC for lights, pumps and fans. Most converters also charge the house battery bank. Converter output is rated in amps, and a 55-amp unit is a common size in mid-sized trailers. Manufacturers typically specify a maximum continuous output, so a converter that is always running near its rating will run hot and wear out sooner.
Inverter
An inverter does the opposite of a converter: it turns 12V battery power into 120V AC for outlets and appliances. Inverter size is measured in continuous watts, so you need to match it to what you plan to run at the same time.
Battery Bank
Your house batteries store energy for off-grid use. Lead-acid, AGM and lithium (LiFePO4) batteries behave differently, especially in usable capacity and charging rate. Lithium batteries typically allow a larger share of their rated capacity to be used, while flooded lead-acid batteries are usually recommended to stay above roughly half charge for longevity. Check your battery manufacturer’s specifications for exact depth-of-discharge limits.
Solar Charge Controller
If you have solar panels, a charge controller regulates the current going into the batteries. MPPT controllers are generally more efficient than PWM types, particularly in cool weather or when panel voltage is much higher than battery voltage.
Transfer Switch and Breakers
The transfer switch chooses between shore power and generator power and prevents the two from being connected at once. Breakers protect each circuit. Keep the panel labeled; a clear map saves a lot of time when something trips.
Monitor Panel
A battery monitor or control panel shows voltage, current and state of charge. Many owners find a shunt-based monitor more accurate than voltage alone, because voltage can read misleadingly high or low depending on load and recent charging.
Step 1: Map Your Loads and Daily Power Needs
Before you touch any hardware, write down what you run and for how long. This is the foundation of every power plan.
- List every appliance and device you use, including lights, fans, the fridge, water pump, phone and laptop chargers, and any CPAP or medical equipment.
- Find the wattage on each label or in the manufacturer’s manual. If only amps are listed, multiply amps by the voltage (120V or 12V) to get watts.
- Estimate hours of use per day for each item.
- Multiply watts by hours to get watt-hours per day, then add the totals.
A 12V compressor fridge drawing about 4 amps at 12 volts uses roughly 48 watts while running. If it runs an average of 8 hours a day, that is around 384 watt-hours. The fridge often cycles, so actual use is usually lower, but using a conservative number keeps your plan honest.
Step 2: Calculate Battery Capacity and Runtime
Once you know your daily watt-hours, you can estimate how many nights your battery bank can cover.
- Find your battery bank’s rated amp-hours (Ah) at 12V and multiply by 12 to get watt-hours.
- Multiply by the usable percentage: roughly 50% for flooded or AGM lead-acid, and a higher share for lithium, per the manufacturer’s specification.
- Divide usable watt-hours by your daily consumption to get the number of days you can operate without recharging.
Example: a 200Ah lithium bank is about 2,560 watt-hours at 12.8V nominal. If your manufacturer lists a usable capacity near 80%, you have roughly 2,000 usable watt-hours. With 600 watt-hours of daily use, that is about three days before recharging.
| Battery Type | Typical Usable Share (check manufacturer) | Charging Note |
|---|---|---|
| Flooded lead-acid | About 50% | Needs regular maintenance and slower charging |
| AGM lead-acid | About 50% | Sealed, handles moderate charge rates |
| Lithium (LiFePO4) | Often 80% or more | Accepts faster charging; check BMS limits in cold weather |
Step 3: Choose Your Power Sources
Your source mix depends on where you camp and how long you stay. Shore power at a campground is simplest. Generators cover gaps but add noise and fuel logistics. Solar keeps batteries topped up without running an engine. If you are planning a solar addition, the RV Solar Power Diagram: How to Read One and Wire Your System article walks through how panels connect to the controller and battery bank.
For boondocking, many owners combine solar with a generator as backup. If you are sizing a generator to run air conditioning, the What Size Generator to Power RV AC: A Step-by-Step Guide (2026) guide explains how starting surge affects the choice.
Step 4: Set Up Your Distribution and Protection
- Confirm breaker sizes match the wire gauge on each circuit. Do not replace a breaker with a larger one to stop nuisance trips.
- Label every breaker and fuse with what it powers.
- Make sure the transfer switch is set correctly before connecting shore power or starting a generator.
- Check that the converter’s output feeds the 12V panel and the battery charge line as designed.
If your converter is misbehaving, the Troubleshooting RV Power Converter: A Step-by-Step Guide for Campers article covers common symptoms and checks.
Step 5: Monitor and Adjust During Your Trip
Check your monitor at the start and end of each day. Note the state of charge after sunset and again after a full day of solar input. If you consistently drop below your target, reduce loads, add charging time, or bring a second power source. A portable power station can supplement the bank for short-term needs; the Using a Portable Power Station in an RV or Camper Van article explains how to connect one safely.
Common Mistakes
- Ignoring the 80% rule for continuous loads: running breakers and cables at their full rating for long periods causes heat.
- Trusting voltage alone: a battery can read full right after charging and drop quickly under load.
- Overloading the inverter: starting surges from air conditioners and microwaves can exceed the continuous rating.
- Mixing battery types: combining old and new batteries or different chemistries reduces performance and can damage charging.
- Skipping the load list: estimating by feel leads to running out of power on day two.
- Working on wiring while connected: disconnect shore power and battery negative before making changes.
Tips for a Reliable Setup
- Keep a printed circuit map and a spare fuse kit in the rig.
- Check battery terminals for corrosion and tightness every few months.
- Use a shunt-based monitor if you rely on the battery bank for multiple days.
- Plan charging windows around your sun exposure and driving days.
- Electrical work near batteries and high-voltage wiring can be hazardous. Consult a qualified RV technician or electrician for installs and repairs.
Recommended gear
A battery monitor with a shunt gives you accurate amp-hour tracking, which is the most useful single upgrade for planning runtime. View on Amazon
A multimeter lets you check voltage at the converter, batteries and outlets when something seems off. View on Amazon
A clamp meter measures current on live circuits without breaking the connection, helpful for checking real loads. View on Amazon
FAQ
What is the main job of an RV power control system?
It manages where power comes from, how batteries are charged, how circuits are protected, and how the state of your system is displayed. It keeps shore power, generator, solar and battery sources working together safely.
How do I know how long my batteries will last?
Divide your usable battery watt-hours by your daily watt-hour use. Use the usable percentage from your battery manufacturer, since lead-acid and lithium differ substantially.
Can I run the air conditioner on batteries?
Usually not for long. Most RV air conditioners draw far more power than a typical battery bank and inverter can supply continuously. Shore power or a suitably sized generator is generally required.
What is the difference between a converter and an inverter?
A converter turns 120V AC into 12V DC and charges batteries. An inverter turns 12V DC from batteries into 120V AC for household-style outlets.
Why does my monitor show different readings than my voltmeter?
Voltage readings are affected by load and recent charging. A shunt-based monitor tracks current flowing in and out, which generally gives a more accurate state of charge.
Should I replace my converter with a larger one?
Only after confirming your wiring, breakers and battery bank can handle the change. A larger converter increases charging capacity but also increases heat and load on the rest of the system. A technician can help you decide.
Is lithium worth it for an RV power system?
Lithium batteries typically offer more usable capacity, longer cycle life and faster charging than lead-acid. They generally need a battery management system and may have cold-weather charging limits, so review the specifications before buying.
How often should I inspect my RV power system?
Check connections and terminals every few months, and inspect the panel, breakers and monitor before each trip. Look for corrosion, heat discoloration, loose wires and unusual smells.
Conclusion
A solid rv power control system starts with knowing your loads, understanding your battery capacity, and choosing sources that match how you camp. Build a clear circuit map, monitor your state of charge daily, and avoid the common overload and wiring mistakes. When in doubt about installation or repairs, a qualified RV technician can verify your setup safely.
Related reading
Ready to choose one?
About Lauren Holland
Lauren Holland is part of our editorial team and reviews and edits our off-grid power for camping, RV & vanlife guides, checking product details against manufacturer specifications and owner feedback.