By Lauren Holland
Updated November 2026
An RV power supply system is the set of components that takes electricity from a source such as shore power, a generator or solar panels and delivers it safely to your lights, pump, fridge and devices. This guide walks you through how those pieces fit together, how to estimate your daily power use, and how to size a setup that will run your camper for the number of nights you actually plan to stay. By the end, you will have a power budget you can trust and a clear list of what to check before you buy or upgrade.
What an RV Power Supply System Actually Includes
Most RVs run on two electrical worlds at once. The 120-volt AC side powers outlets, air conditioners and microwaves when you are plugged in or running a generator or inverter. The 12-volt DC side runs lights, water pumps, fans, the furnace fan and many fridges directly from a battery bank. A complete RV power supply system ties these together with a few core parts:
Shopping for one? See our guide: 7 Best RV Off Grid Power System Options for Campers in 2026.
- Input source: a shore power cord, a generator or solar charge controller.
- Converter or charger: turns incoming AC into 12-volt DC and keeps the batteries charged.
- House battery bank: stores energy for 12-volt loads when no source is connected.
- Inverter: converts battery DC back into 120-volt AC for outlets and appliances.
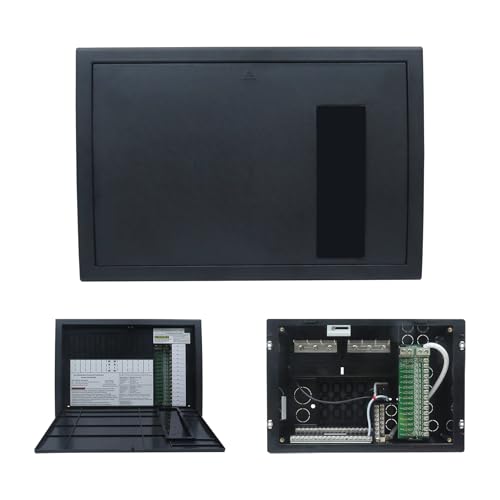
- Distribution panel and breakers: divides power into circuits and protects wiring.
- Monitoring: a battery monitor or display that shows state of charge and amp draw.
Some campers have all of these built in from the factory. Others add pieces over time, especially solar panels or a larger inverter. Knowing which parts you have is the first step to understanding where your power goes.
Step 1: Identify Your Current Power Source and Limits
Start by confirming how your RV receives power and what limits that connection imposes. Check the shore power cord for its rating, usually 30 amp or 50 amp. A 30-amp connection at 120 volts delivers roughly 3,600 watts at most, while a 50-amp service splits into two 120-volt legs for about 12,000 watts total. Your breaker panel label or the cord itself will show the rating.
Next, locate your battery bank and note its chemistry and capacity. Lead-acid batteries are usually rated in amp-hours at a 20-hour discharge rate, and it is wise to use only about half of that rated capacity to avoid shortening battery life. Lithium iron phosphate batteries typically allow a much deeper discharge, but you should still confirm the limit in the manufacturer’s documentation.
For a quick reference, here is how common RV sources compare in practical terms:
| Source | Typical output | Main limit |
|---|---|---|
| 30-amp shore power | About 3,600 W at 120 V | Shared between AC appliances and the converter |
| 50-amp shore power | About 12,000 W total | Two 120 V legs; both must be balanced |
| Generator | Varies by model | Noise, fuel and running hours |
| Solar panels | Depends on array size and sun | Output drops with clouds, shade and season |
Step 2: Build a Daily Power Budget
A power budget is simply a list of what you run, how many watts each item draws, and how many hours per day it runs. Multiply watts by hours to get watt-hours, then add everything together. This total tells you how much energy your RV power supply system must provide every day.
- List every device you plan to use, including lights, water pump, fridge, fans, phone chargers, laptop and any cooking appliances.
- Find the wattage on each device’s label or manufacturer spec sheet. Use the running wattage for steady loads and note the startup surge for motors.
- Estimate daily run time honestly. A fridge may cycle for only part of each hour, so use the duty cycle the manufacturer lists if available.
- Multiply watts by hours for each device, then sum the results to get daily watt-hours.
- Add a 20 percent margin for cloudy days, battery aging and forgotten devices.
A simple example: LED lights at 20 watts for 4 hours equal 80 watt-hours. A 12-volt compressor fridge drawing an average of 40 watts for 12 hours equals 480 watt-hours. A water pump at 60 watts for 0.25 hours equals 15 watt-hours. Those three loads total 575 watt-hours per day before margin.
Step 3: Convert Your Budget Into Nights of Autonomy
Once you know daily watt-hours, you can estimate how many nights your batteries will last without any charging. Divide your usable battery energy by your daily need. Usable energy is the amp-hour rating times the system voltage (usually 12 volts), multiplied by the usable depth of discharge you have confirmed.
For example, a 200 amp-hour lithium battery at 12 volts holds about 2,400 watt-hours. If you can safely use 80 percent of that, you have roughly 1,920 usable watt-hours. Dividing by the 575 watt-hour daily budget gives about three nights before you need to recharge. A lead-acid bank of the same rating, limited to 50 percent, would give only about 1,200 usable watt-hours, or roughly two nights.
These numbers assume no solar or shore input. If you have 400 watts of solar panels that average around 4 peak-sun hours in your area, you could theoretically add around 1,600 watt-hours per day, though real-world losses from wiring, controllers and temperature will reduce that. Treat solar output as a range, not a guarantee.
Step 4: Check Inverter Size and Surge Ratings
An inverter must handle both your continuous load and the startup surge of motors such as air conditioners, microwaves or power tools. Choose an inverter with a continuous rating above your expected simultaneous AC load, and check that its surge rating covers the highest startup current you will encounter. Manufacturers list both figures, so compare them against your appliance nameplates.
Remember that an inverter’s efficiency matters. Most units lose some power as heat, so your battery draw will be higher than the AC load you actually use. Factor in roughly 10 to 15 percent extra when calculating battery needs.
Step 5: Wire, Protect and Monitor the System
Wiring is where many RV power supply systems fail. Use cable gauges that match the current and run length, fuse or breaker each battery connection close to the source, and keep positive and negative cables clearly separated. Undersized wire can overheat under load, which is a fire risk. If you are not confident working with high-current DC wiring, consult a qualified RV technician or electrician before making changes.
A battery monitor gives you real-time state of charge and amp draw. Without one, you are guessing at voltage, which is an unreliable measure of how much energy remains, especially on lead-acid batteries under load.
Common Mistakes to Avoid
- Sizing the battery bank without a written daily budget.
- Ignoring the inverter’s efficiency loss and surge rating.
- Treating total battery amp-hours as fully usable.
- Running a 30-amp shore connection with large AC loads at the same time as the converter.
- Using extension cords or adapters that are undersized for the load.
- Forgetting that cold weather reduces lead-acid capacity and can limit lithium charging.
- Skipping regular checks of connections, terminals and fuses.
Tips for a Reliable Setup
- Track your actual usage for a few days before upgrading anything.
- Stagger high-draw appliances so you do not run them all at once.
- Keep a spare fuse set and a multimeter in the RV.
- Check battery terminals for corrosion every few months.
- Recalculate your budget whenever you add a device.
Recommended gear
A battery monitor is one of the most useful additions to any RV power supply system because it shows real energy use rather than estimated voltage. Look for a shunt-based monitor that tracks amp-hours in and out. View on Amazon
A clamp-on or plug-in power meter helps you measure the actual wattage of individual appliances before you build your budget, which is far more accurate than label estimates. View on Amazon
A quality multimeter lets you check voltage, continuity and current at connections during troubleshooting. View on Amazon
Further Reading on Power Planning
If you are still deciding on a source, Power Supply for Rv (2026): Which Should You Choose? compares the main options side by side. For solar-specific wiring, RV Solar Power Diagram: How to Read One and Wire Your System walks through a typical layout. If you are weighing off-grid options more broadly, 5 Best Off Grid RV Power Systems for Boondocking in 2026 covers configurations for longer stays, and Rv Power Management System: A Practical Guide (2026) explains how monitoring and load control fit together.
FAQ
How many batteries do I need for an RV power supply system?
It depends on your daily watt-hour budget and how many nights you want to stay without charging. Calculate usable energy per battery, then divide your daily need by that figure. Most weekend campers find a single well-sized battery is enough, while longer off-grid stays usually need more capacity or a charging source.
Can I run my air conditioner on battery power?
Generally not for long. A typical RV air conditioner draws far more energy than a battery bank of ordinary size can supply for more than short periods. Most owners run AC from shore power or a generator sized for the load. Check your unit’s rating and consult a professional before assuming battery support.
What is the difference between a converter and an inverter?
A converter changes 120-volt AC input into 12-volt DC to run your 12-volt loads and charge batteries. An inverter does the reverse, turning battery DC into 120-volt AC for outlets. Many RVs have one or both, and a combined unit is often called an inverter-charger.
Does lithium or lead-acid work better for RV use?
Lithium iron phosphate batteries generally offer more usable capacity, lighter weight and longer cycle life, but they cost more up front and need compatible charging. Lead-acid is familiar and less expensive initially, though it typically gives less usable energy and needs more maintenance. Choose based on how you camp and how much you plan to use the system.
How much solar do I need for my RV?
Divide your daily watt-hour budget by the average peak-sun hours at your typical camping locations, then add losses for wiring and controller efficiency. A rough estimate works well for planning, but seasonal and regional sun differences can change results significantly.
Is it safe to run a 50-amp RV on a 30-amp outlet?
Using an adapter to connect a 50-amp RV to a 30-amp outlet limits your total available power and can overload the connection if you run heavy loads. Keep consumption low and monitor the circuit. Check the adapter rating and consult a qualified electrician if you have concerns about pedestal wiring.
How often should I check my RV power system?
Inspect connections, terminals and fuses at least a few times per year, and more often if you travel on rough roads or in extreme temperatures. Look for corrosion, loose wires, heat discoloration and any signs of unusual battery swelling or leakage.
Do I need a professional to install an RV power supply system?
Simple upgrades like swapping a battery monitor or adding a plug-in meter are manageable for many owners. Larger changes, such as new inverters, battery banks or solar wiring, involve high current and fire risk. A qualified RV technician or electrician can verify ratings and wiring before you rely on the system.
Conclusion
An RV power supply system is easiest to manage when you understand each component and build your plan around real daily use. Start with a written power budget, convert it into nights of autonomy, and confirm that your inverter, wiring and protection can handle the loads you expect. Monitor your usage for a few trips, and adjust as your camping style changes. A little planning up front will give you more time enjoying your campsite and less time wondering where the power went.
Ready to choose one?
About Lauren Holland
Lauren Holland is part of our editorial team and reviews and edits our off-grid power for camping, RV & vanlife guides, checking product details against manufacturer specifications and owner feedback.