 By Lauren Holland
Updated November 2026
A power box for RV setups, sometimes called an RV power outlet box or power pedestal, gives you a safe, organized place to connect your rig to campground or home shore power. This guide walks you through what the box does, how to match it to your RV’s amperage, how to install or check one, and how to avoid the mistakes that cause tripped breakers and damaged electronics.
What a Power Box for RV Actually Does
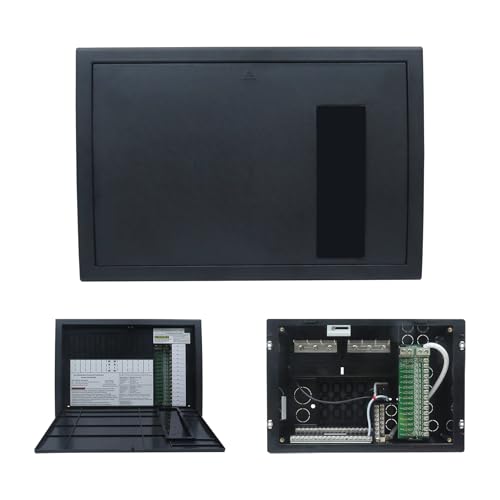
A power box for RV use is an enclosure that houses one or more outlets, breakers and sometimes a meter. It takes incoming power from a campground pedestal, a home hookup or a generator and delivers it to your RV through a cord. Some boxes are permanent fixtures mounted on a wall or post. Others are portable units that plug into a standard outlet and give you a 30 amp or 50 amp receptacle at the far end.
Most RVs use one of two shore power standards in the United States: a 30 amp connection (a single 120-volt hot leg, rated at 30 amps) or a 50 amp connection (two 120-volt legs that combine to 240 volts). The power box you choose needs to match your rig’s inlet and the amperage available at the site.
Step 1: Confirm Your RV’s Amperage and Inlet
Before you shop or install anything, check what your RV requires. Look at the shore power inlet on the outside of the coach, which is usually near the rear or side. It will be labeled, and the plug style tells you the rating.
- 30 amp: A three-prong plug with two flat blades and a round ground pin, rated for 125 volts.
- 50 amp: A four-prong plug with two hot blades, a neutral and a ground, rated for 125/250 volts.
- Check your owner’s manual for total electrical load and any manufacturer limits on adapters.
Also note the length of your cord and where your hookup sits relative to the campsite pedestal. A box that forces you to stretch a cord across a walkway is a trip hazard and a voltage-drop risk.
Step 2: Understand the Power Box Components
A typical power box for RV hookups includes several parts. Knowing what each one does helps you spot problems quickly.
- Receptacle: The socket that accepts your RV cord plug.
- Circuit breaker: Protects the wiring and your RV from overloads. Breaker size should match the receptacle rating.
- GFCI protection: A ground-fault circuit interrupter cuts power if current leaks to ground, which matters around water.
- Surge protection: Some units include a surge device to guard against voltage spikes. A surge protector can also be added separately.
- Voltmeter or polarity indicator: Useful for confirming the pedestal is wired correctly before you plug in.
For a deeper look at protection options, see RV Power Surge Protection: How to Choose and Install One Safely and RV Power Surge Protectors: How to Choose and Install One (2026).
Step 3: Compare Power Box Types
Not every box suits every rig. The table below summarizes the common categories by how they are used.
| Box Type | Typical Use | Main Strength | Main Limitation |
|---|---|---|---|
| Permanent wall or post mount | Home driveway or long-term site | Clean, weather-protected installation | Requires a licensed electrician for wiring |
| Portable outlet box | Temporary hookups, storage lots | Easy to move and set up | Needs a correctly rated source outlet |
| 30 amp outlet box | Smaller rigs and trailers | Simple, widely available | Limits total load to about 3,600 watts |
| 50 amp outlet box | Larger motorhomes with dual AC | Supports high loads, including air conditioning | Heavier, more expensive to wire correctly |
For model-level comparisons, read 7 Best RV Power Outlet Box 30 Amp Options for Campers (2026) and 6 Best 50 Amp RV Power Box Options for Campers (2026). If you run a larger system, RV Power Pole with Meter: How to Choose, Install and Use One (2026) covers metered pedestals.
Step 4: Install or Inspect the Power Box Safely
Installation involves line voltage, which can cause serious injury or fire if handled wrong. Treat the steps below as a checklist for a qualified electrician, or as a way to inspect an existing box before use.
Tools and Materials Checklist
- Non-contact voltage tester and multimeter
- Correct gauge wire for the circuit (typically 10 AWG for 30 amp, 8 AWG or 6 AWG for 50 amp, depending on run length)
- Weatherproof enclosure rated for outdoor use
- Breaker matched to receptacle rating
- Ground rod and bonding hardware where required
- Conduit, fittings and sealant rated for wet locations
Inspection Steps
- Turn off power at the source breaker and confirm with a tester.
- Check the receptacle for scorching, cracks, loose blades or discoloration.
- Verify the ground connection is intact and bonded to the box.
- Confirm the breaker size matches the receptacle rating.
- Inspect the enclosure seal and cover gasket for water intrusion.
- Restore power and test with a polarity tester before plugging in your RV.
If you find any of these issues, stop and have a licensed electrician repair the box. Do not attempt to modify live wiring yourself.
Step 5: Connect and Use Your RV Safely
Once the box is verified, connection is straightforward, but order matters.
- Turn off all RV appliances and the RV’s main breaker.
- Plug the cord into the power box receptacle first, then into the RV inlet.
- Turn the box breaker on, then switch on the RV main breaker.
- Check the RV’s surge or monitor panel for voltage and polarity status.
- Start high-draw appliances one at a time, such as air conditioning, microwave and water heater, to avoid overloading.
For guidance on cords and storage, see RV Power Cord Storage: 7 Steps to Keep Cords Clean and Safe. If you add battery or solar backup, Using a Portable Power Station in an RV or Camper Van explains how to combine sources.
Common Mistakes to Avoid
- Using an undersized cord or adapter. A 30 amp cord on a 50 amp pedestal, or the reverse, causes overheating. Adapters must be rated for the load.
- Ignoring reverse polarity or open ground warnings. These usually mean the pedestal is wired wrong. Do not plug in.
- Running several high-draw appliances at once. Electric heat and air conditioning can trip a 30 amp breaker quickly.
- Leaving receptacles exposed to rain. Use in-use covers and keep the box sealed.
- Skipping routine checks. Corrosion and loose connections develop over time.
Tips for Getting More From Your Power Box
- Check the box and cord before every trip, not just the first time.
- Keep a spare breaker-rated adapter in your storage compartment.
- Use a surge protector in the RV if the campground box lacks one.
- Label your breakers and the RV circuit map so troubleshooting is faster.
- Photograph the pedestal layout at campgrounds you return to often.
Recommended Gear
- Surge protector for RV use: Adds voltage spike protection between the pedestal and your coach electrical system. View on Amazon
- Non-contact voltage tester: Lets you confirm a receptacle is de-energized before inspecting it. View on Amazon
- Outdoor in-use cover for RV receptacles: Keeps rain and debris out of the box while plugged in. View on Amazon
FAQ
What is the difference between a 30 amp and 50 amp power box for RV?
A 30 amp box delivers one 120-volt leg rated at 30 amps, about 3,600 watts total. A 50 amp box delivers two 120-volt legs for 240 volts at 50 amps, roughly 12,000 watts total, which supports larger air conditioners and multiple appliances.
Can I use a 30 amp RV on a 50 amp pedestal?
Yes, with a correctly rated adapter, but only if the total load stays within 30 amps. Use the adapter and cord rated for the connection, and do not exceed the RV’s limits.
Do I need a GFCI on my power box?
GFCI protection is strongly recommended for outdoor and wet-location receptacles. Many campground boxes include it, and it is required in many jurisdictions for outdoor outlets.
How often should I inspect my RV power box?
Inspect it before each trip and after any storm or flood. Look for corrosion, cracked covers, loose blades and heat marks.
Can I install a power box myself?
Basic inspection and cover replacement are reasonable DIY tasks with the power off. Wiring a new box involves line voltage and local code requirements, so consult a licensed electrician.
What causes a power box breaker to trip?
Overloading is the most common cause, such as running air conditioning with a microwave on a 30 amp service. Ground faults, wiring faults and a damaged cord also trip breakers.
Is a surge protector necessary with a power box for RV use?
It is not mandatory, but it protects sensitive electronics from voltage spikes and reversed polarity. Many RV owners consider it a worthwhile addition, especially at unfamiliar campgrounds.
Does a power box work with solar or generator power?
A standard power box is designed for utility or generator input. Solar and battery systems usually feed an inverter, transfer switch or coach power system instead. Consult a qualified installer before connecting multiple sources.
Conclusion
A power box for RV use is only as good as its match to your rig and the site’s supply. Confirm your amperage, inspect the box before every connection, and avoid overloading. When wiring or repairs are needed, bring in a licensed electrician to keep your setup safe and reliable.
Ready to choose one?
About Lauren Holland
Lauren Holland is part of our editorial team and reviews and edits our off-grid power for camping, RV & vanlife guides, checking product details against manufacturer specifications and owner feedback.